
SO, that being said, I redid them. I knew this would not be our forever home, so I really didn't want to put my hard earned cash into new granite countertops for someone else to enjoy once we outgrew our little nest. NO WAY! I decided to go the cheaper route and update them myself.
Now as a disclaimer, usually when I opt to do things myself they are way more awesome in my head than they are in real life. This happens 99.92% of the time. But even with my track record, I could not STAND for the beige to make my kitchen experience any more bland. I went for it. After much research...by much, I mean I thought of my plan and googled it to see if anyone else had the same thoughts...I found the easiest, and quickest way to rid myself of the boring beige monster. SPRAY PAINT.
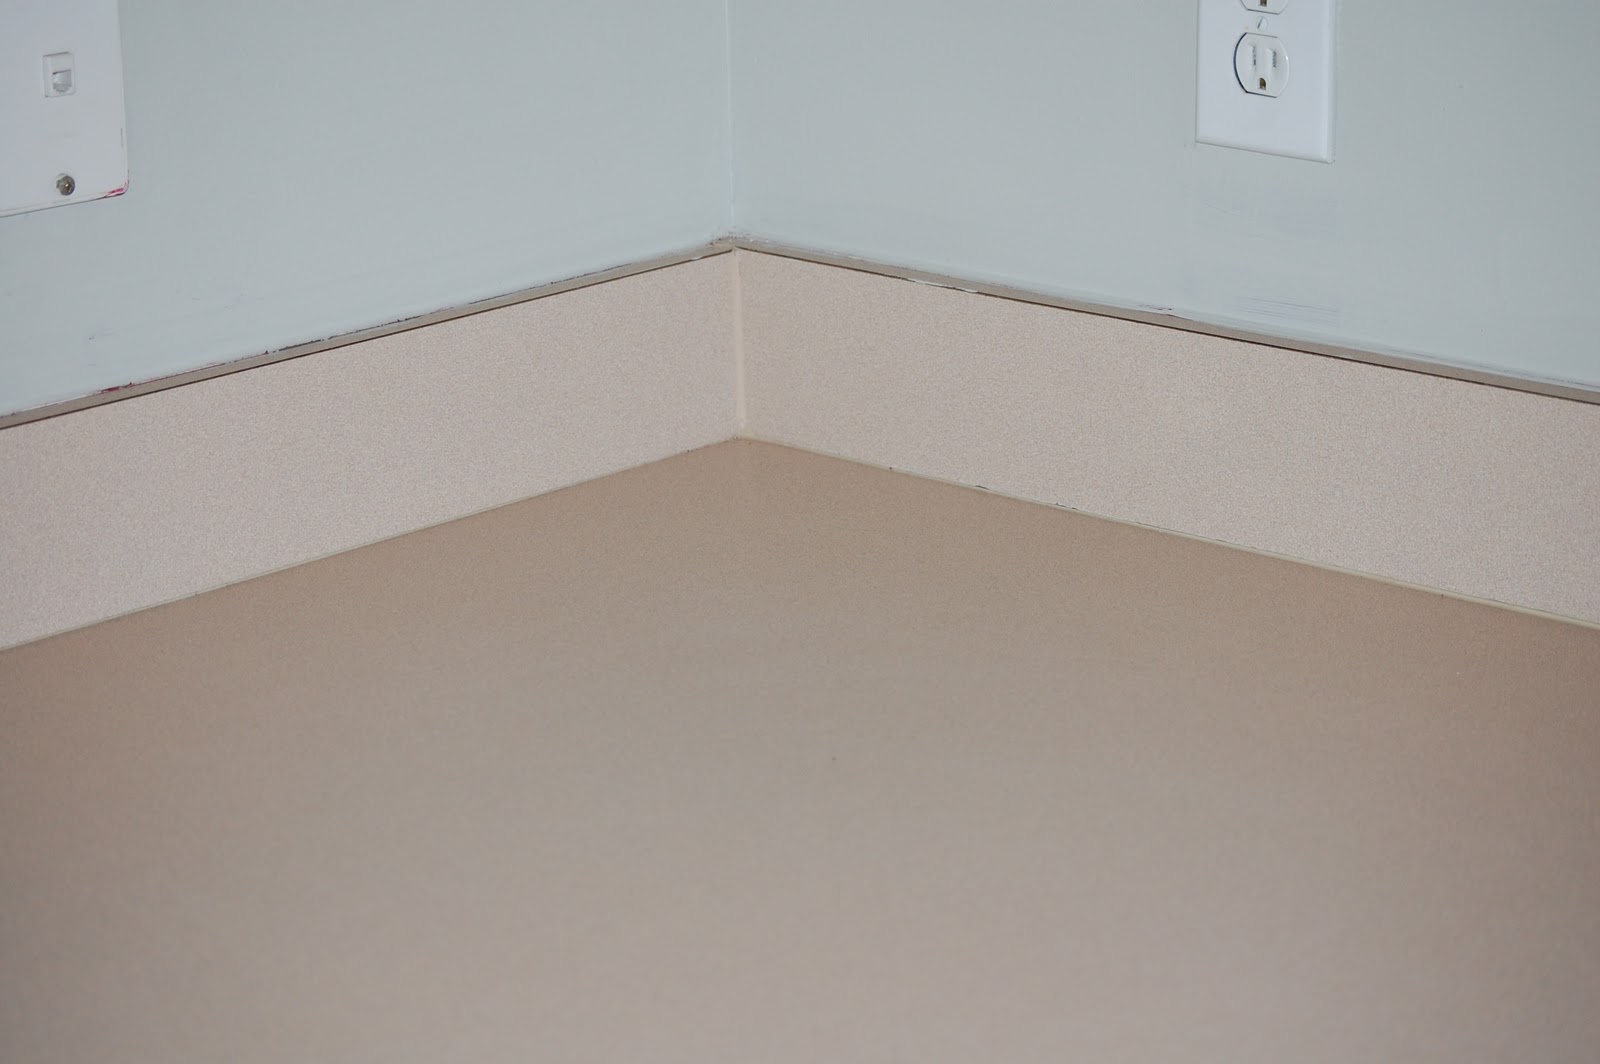
Now while my countertops look like nothing professional, I do have to say they are WAY better than the...I even hate to say it... (beige). I can FINALLY eat and cook in a place that isn't the most boring color ever. GO ME!!! (and GO MY HUBBS for letting me take over the kitchen for a few days).
Here you go...step by hideous step...
1. Get some ugly beige counters.

2. Get a wild hair up your fanny and get supplies to rid yourself of said counters...a sledge hammer, lighter fluid and matches were NOT on my list...this time.


3. Be sure you have enough paint so you don't have to make 2 more trips to the store.
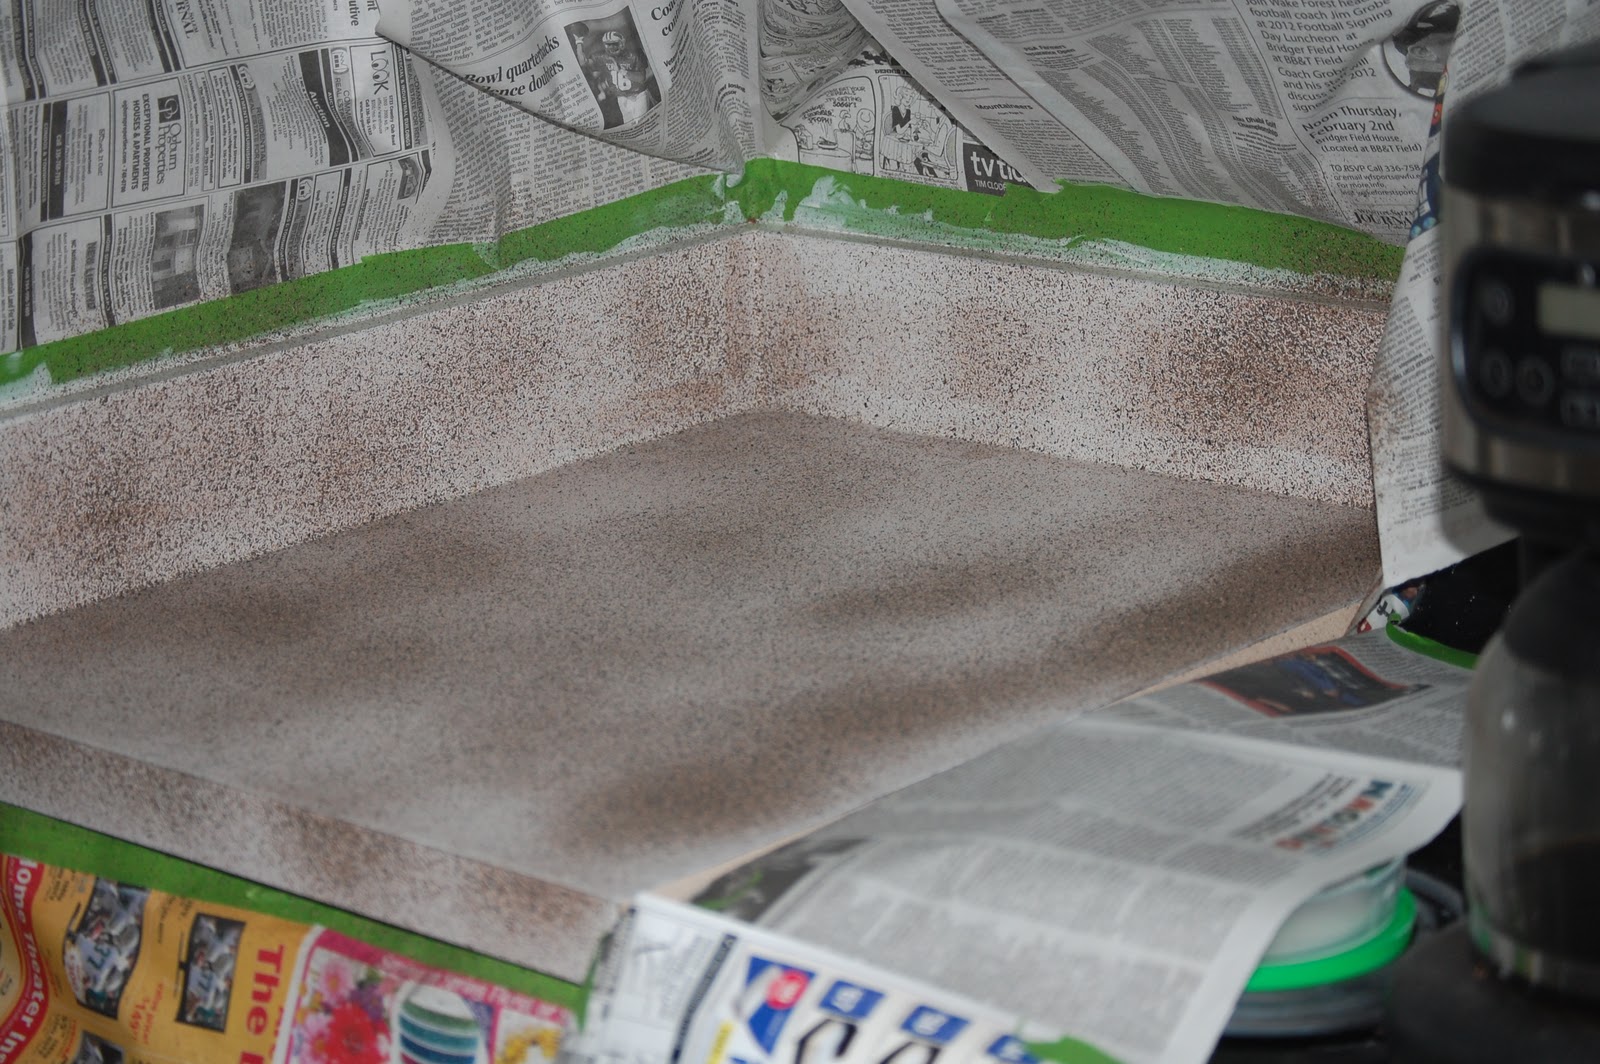
4. PREP...I used a straight razor to scrape off as much caulk as I could. Then I taped off the counters. I used the green Frog tape and I LOVE it!!!


5. Sand and clean the counter. Seriously...I lightly sanded...no elbow grease needed.
6. Save newspapers every day for 2 weeks. Then newspaper EVERYTHING. I still had to clean up spatter. Spray paint is MESSY!!!


7. Prime. I used Kilz primer only because it is what the other 2 crazies used on the "How To" blogs I read. It is AWESOME! But remember that you shouldn't try to use bare hands to clean anything with primer on it. It is oil based and someone remembered that the hard way. That'd be me. It's cool though.


8. WAIT...A REALLY LONG TIME. Let the primer dry REALLY well.
9. Spray paint. Dear heavens...open a window...or don't. It depends on what you want your day to be like I guess...Light coats work better. The paint I chose was super thick and had a pebbly texture. Light coats meant no globs.

10. WAIT...30 minutes to an hour seemed like a good time. Then add more paint.


11. Wait some more. Then go back to the store to get more paint only to find that they are out so you have to go to another store for 2 more cans...Just me? oh.
12. Paint some more.


13. It took between 4 and 5 coats of paint. 7 cans total, with a teensy bit left for touch ups.
14. Start with the polyurethane. OPEN THE WINDOW...or don't. I am on coat number 2...I'll most likely end up with at least 3, maybe more...It is a kitchen after all. Here's where I am now...Not too shabby!

15. DONE!


P.S. It blows to not be able to use the kitchen.
P.S.S NO MORE BLAH!!!!
Cheers!